
Coney Island Protein Ice Cream

IT’S FAIR SEASON 🎪!!! And what’s the first thing you think of when you think fair? When you’re imagining the twinkling lights at dusk? The rides that are on their last limb? The desire to eat one of everything you pass? What is the one thing you absolutely cannot leave the fair without? The answer is…….. FUNNEL CAKE! And what is the topic of today’s episode? ICE CREAM CONES!
This Coney Island Protein Ice Cream… honestly, I lowkey can’t remember what possessed me to make this, but now that I’m revisiting the thought, I have a bone to pick. So I was just thinking to myself, hm… why did I make this? And then I was like, OH because I love the bottom of the ice cream cone… that last bite of melted ice cream in the crevices of a cake cone is just CHEF’S KISS. AND THEN! I was like, omg I used to love getting ice cream cones from McDonald’s, and then I remembered how they used to be 50 cents. And then one day, I woke up and they were 10 million dollars a cone, and I had to decide between going broke or being deprived of that nostalgic 50-cent ice cream cone feeling. And guess what I decided to do? 😔✋ I appreciate your condolences. Let’s get into the recipe!
Why This Recipe Works
There are a lot of protein ice cream recipes floating around, but this one stands out for a few reasons:
- Texture & Creaminess – Using 2% milk plus a scoop of vanilla protein and sugar-free pudding mix creates that thick, creamy texture that the Ninja Creami does so well. It doesn’t feel icy or watered down—it feels like real soft serve.
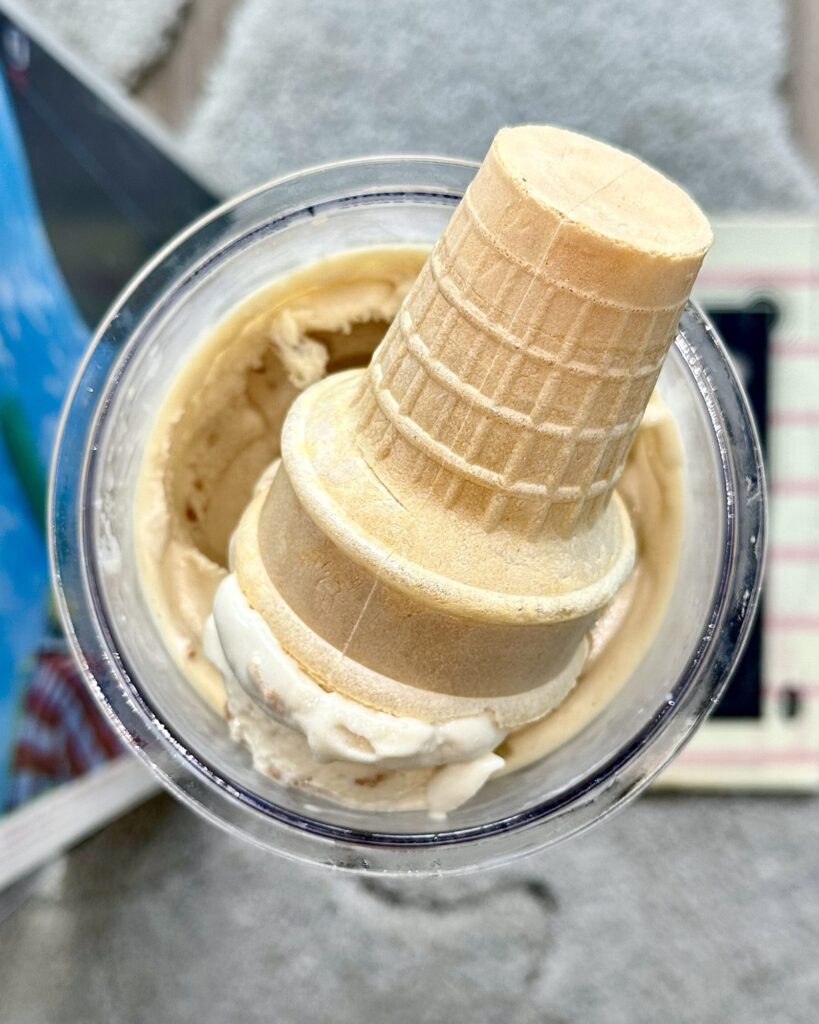
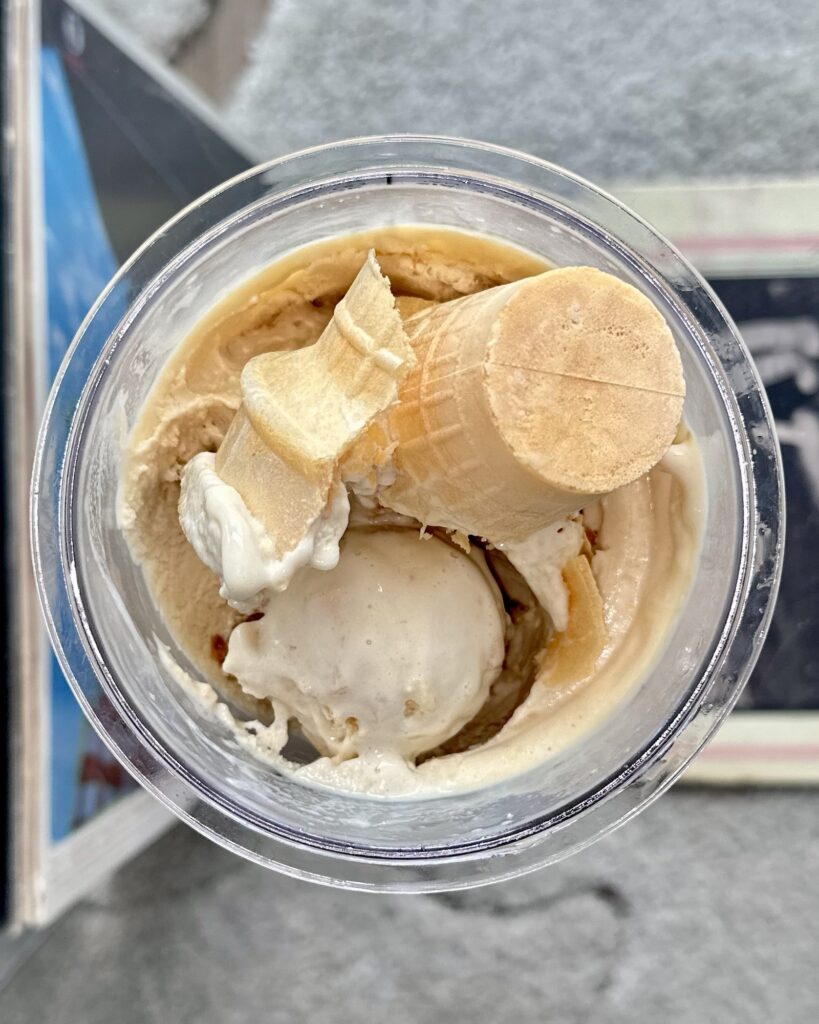
- Playful Mix-In – Instead of just topping with sprinkles or chocolate chips, the mix-in is an actual ice cream cone, which gets crushed into the center of the pint. That means every bite has a little crunch, like eating a deconstructed ice cream cone.
- Balanced Flavor – The vanilla base is classic and versatile, and the cones add both flavor and texture. The sugar cone brings caramelized sweetness, while the cake cone is lighter and more buttery. Together, they give that full “Coney Island ice cream stand” experience.
- Customizable – Want chocolate instead of vanilla? Want to drizzle sugar-free caramel over the top? Want to swap cones for waffle cone pieces? You can take this recipe in endless directions.
Ingredients
Here’s everything you’ll need for the base and mix-ins:
Ice Cream Base
- 360 ml (1 ½ cups) 2% milk – gives creaminess without being too heavy
- 1 scoop (31 g) vanilla protein powder – your favorite brand works here
- 14 g sugar-free vanilla pudding mix – the secret to that thick, creamy consistency
- 1 tbsp vanilla extract – deepens the vanilla flavor
- 1 tsp stevia (or sweetener of choice, to taste) – optional if your protein powder is already sweet
- ⅜ tsp salt (if you want it precise) – enhances sweetness and balances flavor
Mix-Ins & Toppings
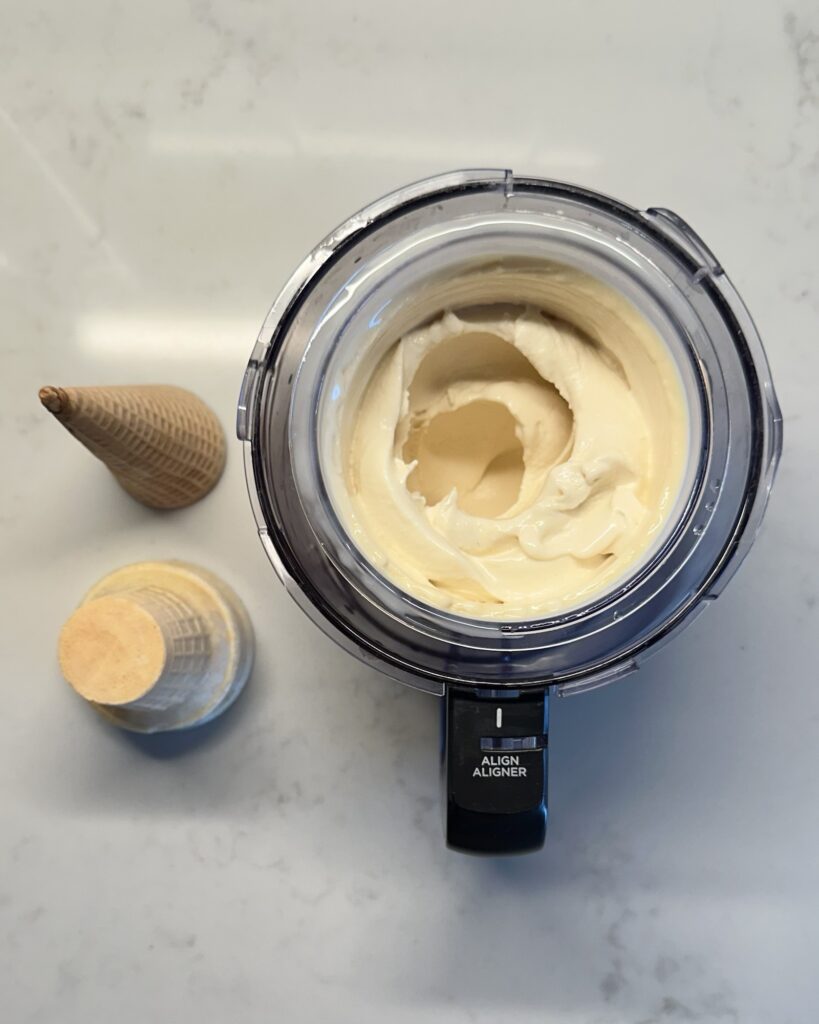
- 1 sugar cone – for crushing into the center of the ice cream
- 1 cake cone – for topping (whole or crushed, your choice)
Step-by-Step Instructions
Blend the Base
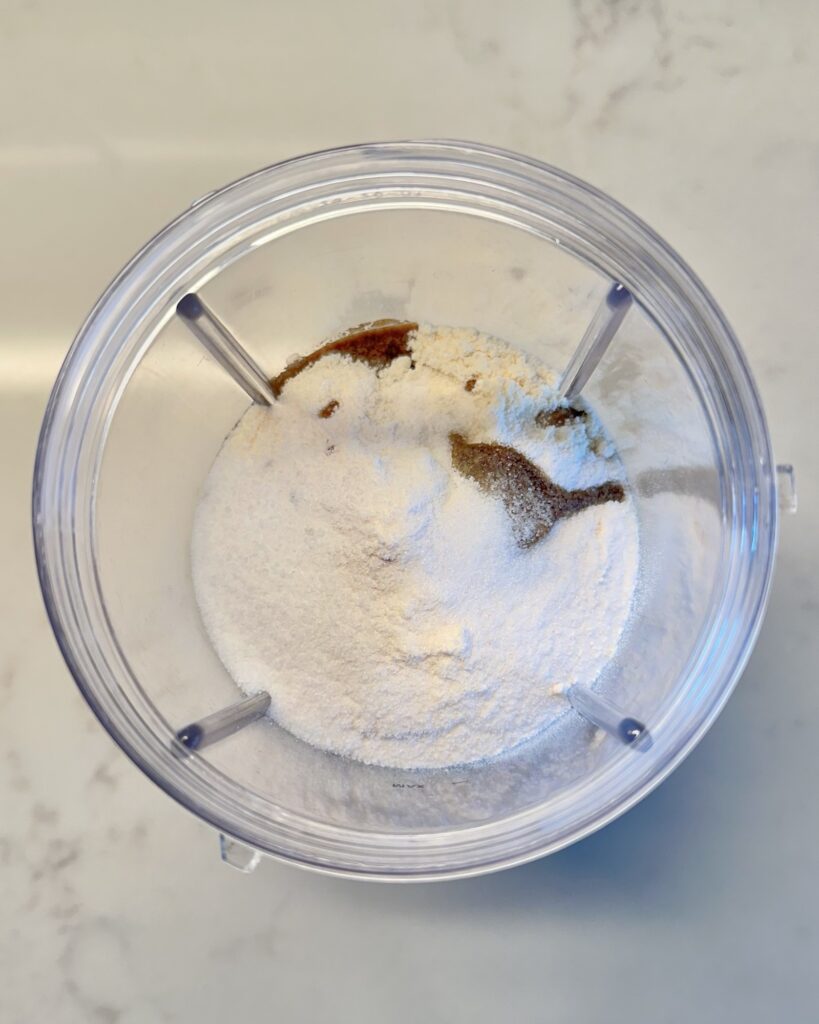
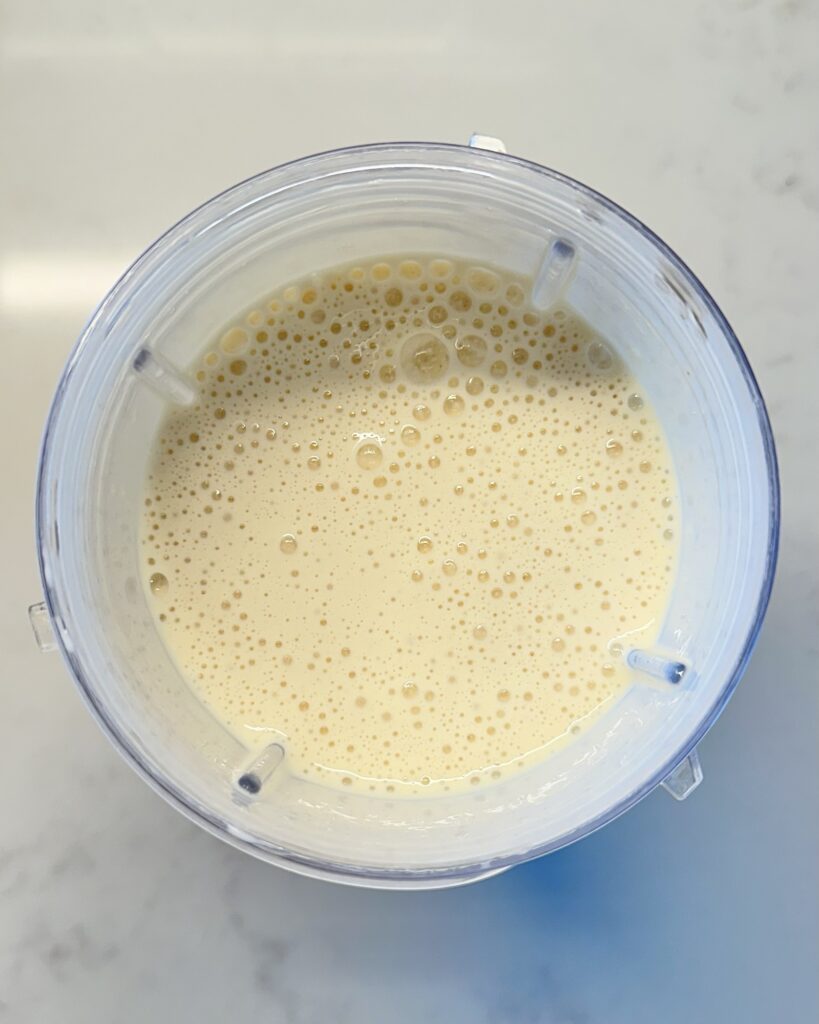
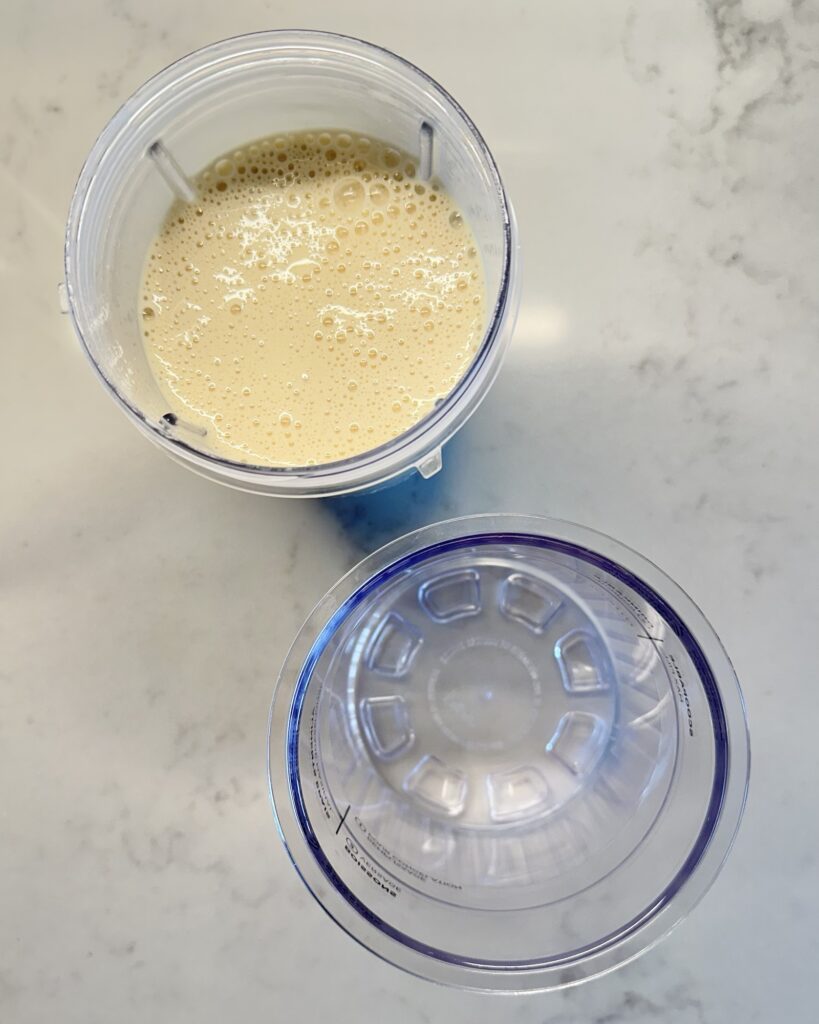
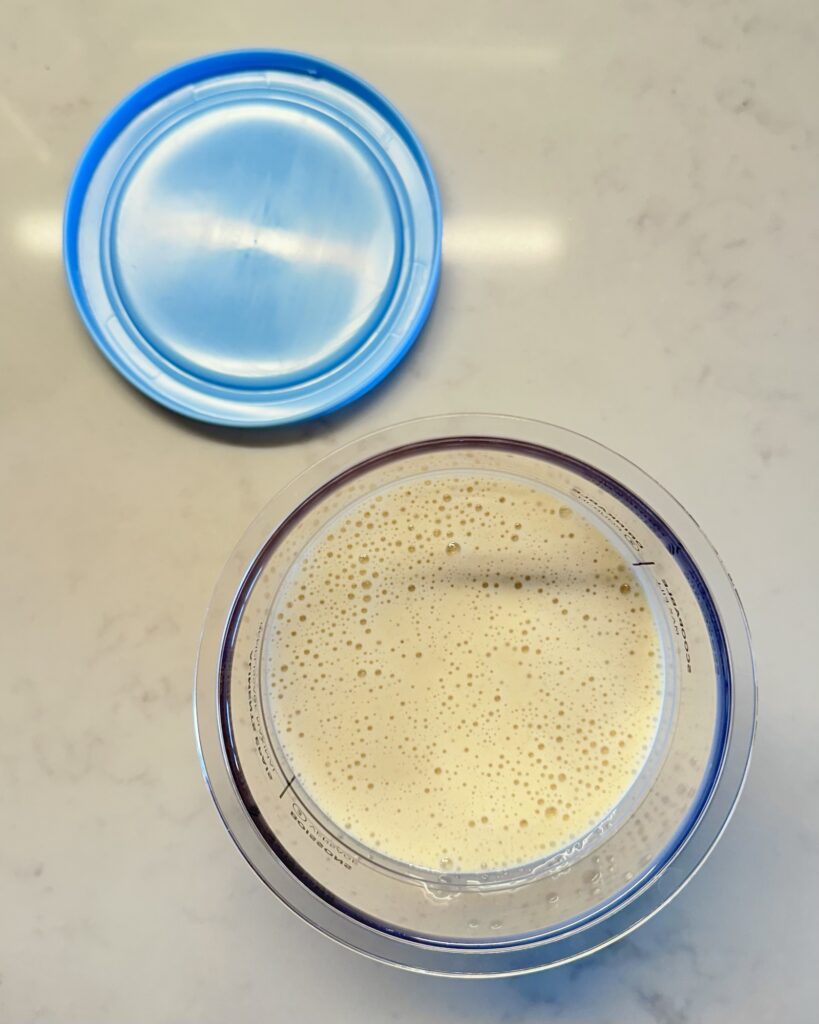
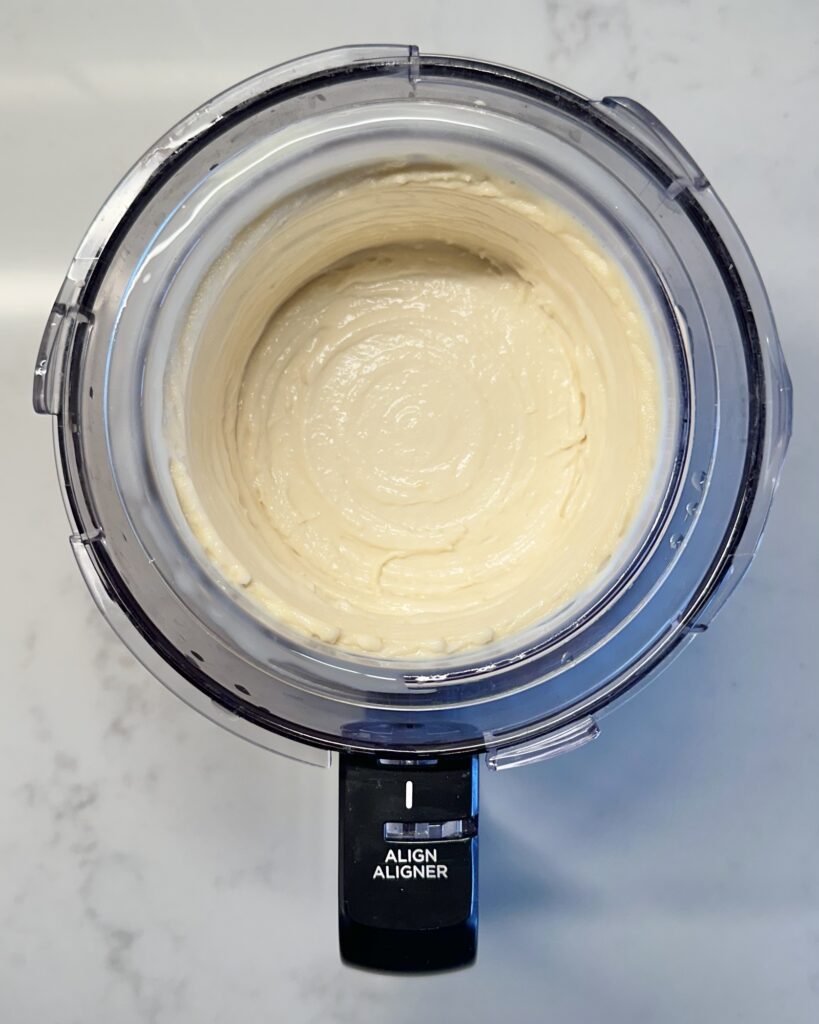
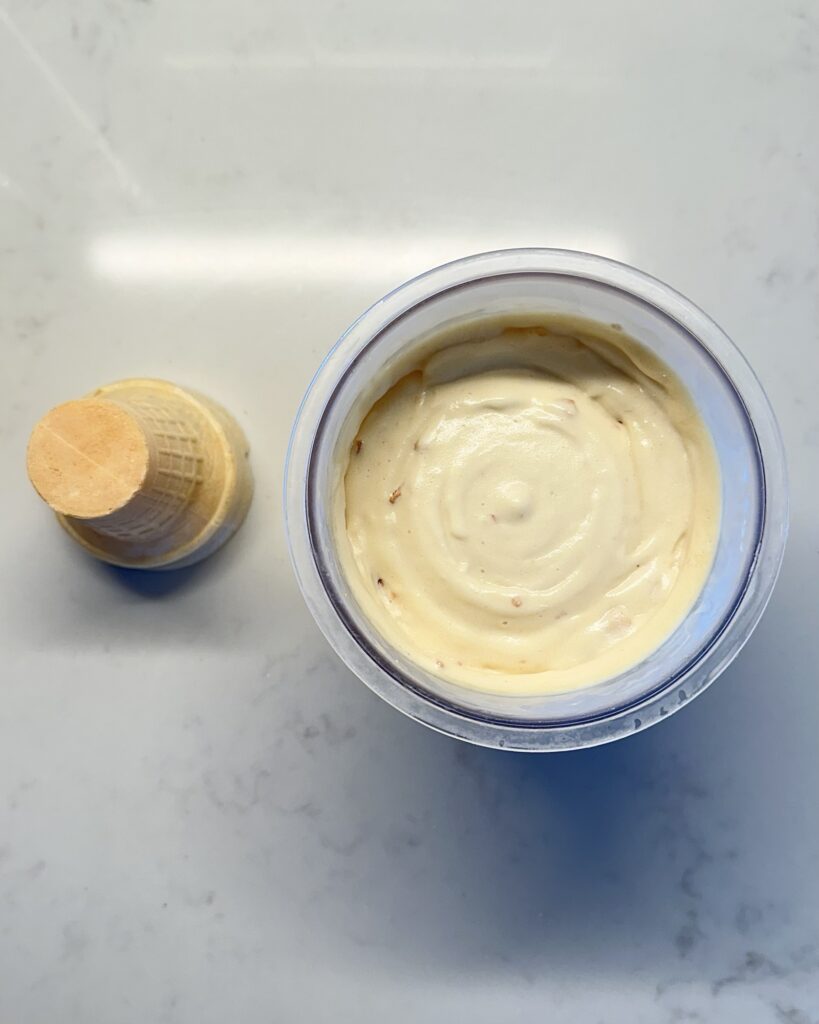
Add milk, protein powder, pudding mix, vanilla extract, sweetener, and salt into a blender. Blend on high until smooth and fully combined. The pudding mix thickens slightly even before freezing, giving you that creamy head start.
Freeze Overnight
Pour the mixture into a Ninja Creami pint, making sure it’s level on top. Freeze for at least 24 hours. This step matters—less time and the texture won’t be right.
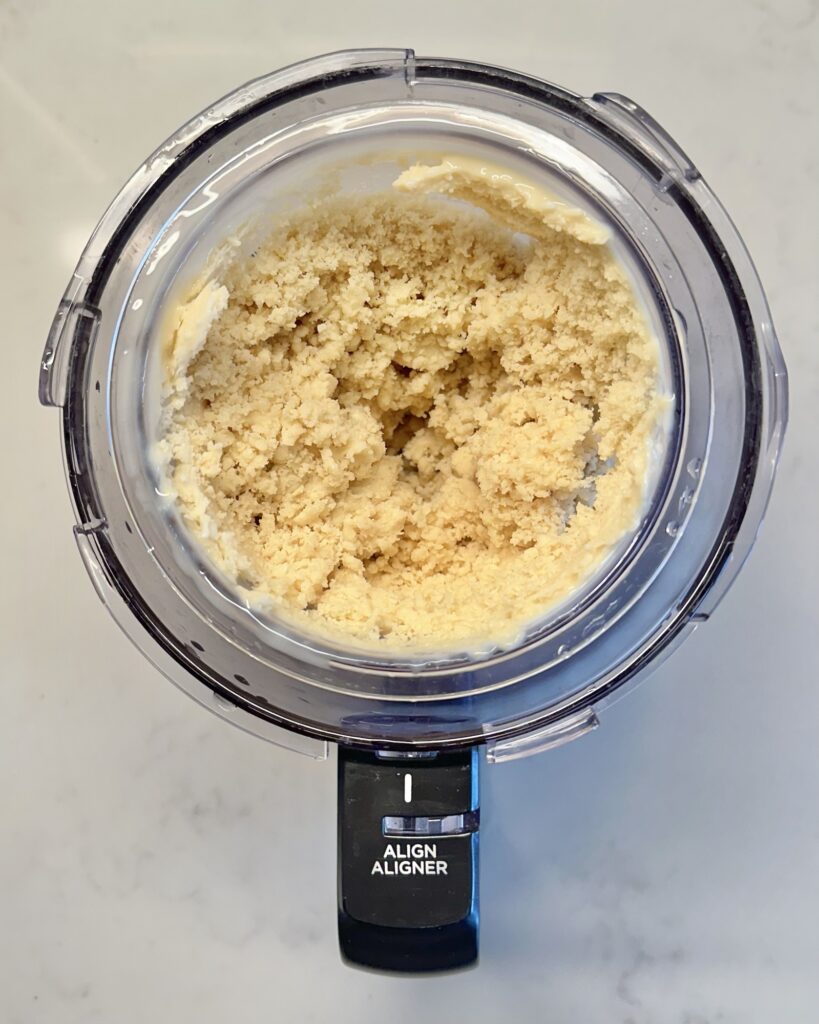
Spin It
Once fully frozen, remove the pint and run warm water over the outside for about 1–2 minutes (including the bottom). Place it into the Creami and spin on Light Ice Cream mode. Re-spin one to two times if needed until smooth and creamy.
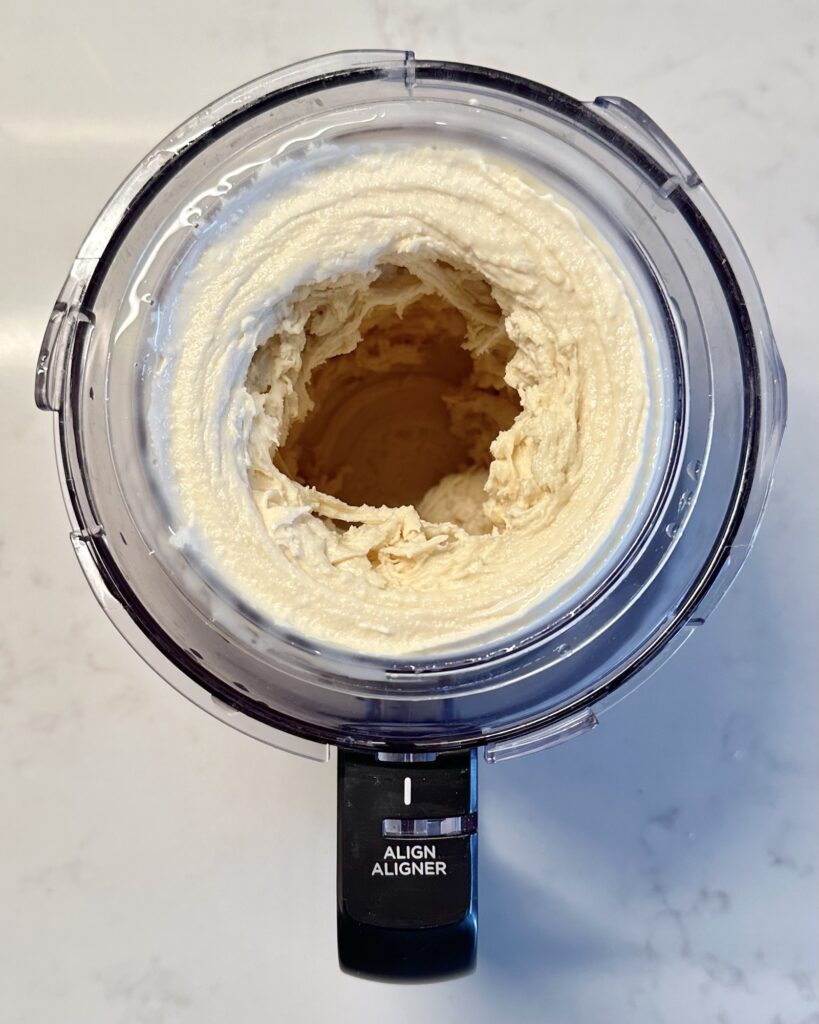
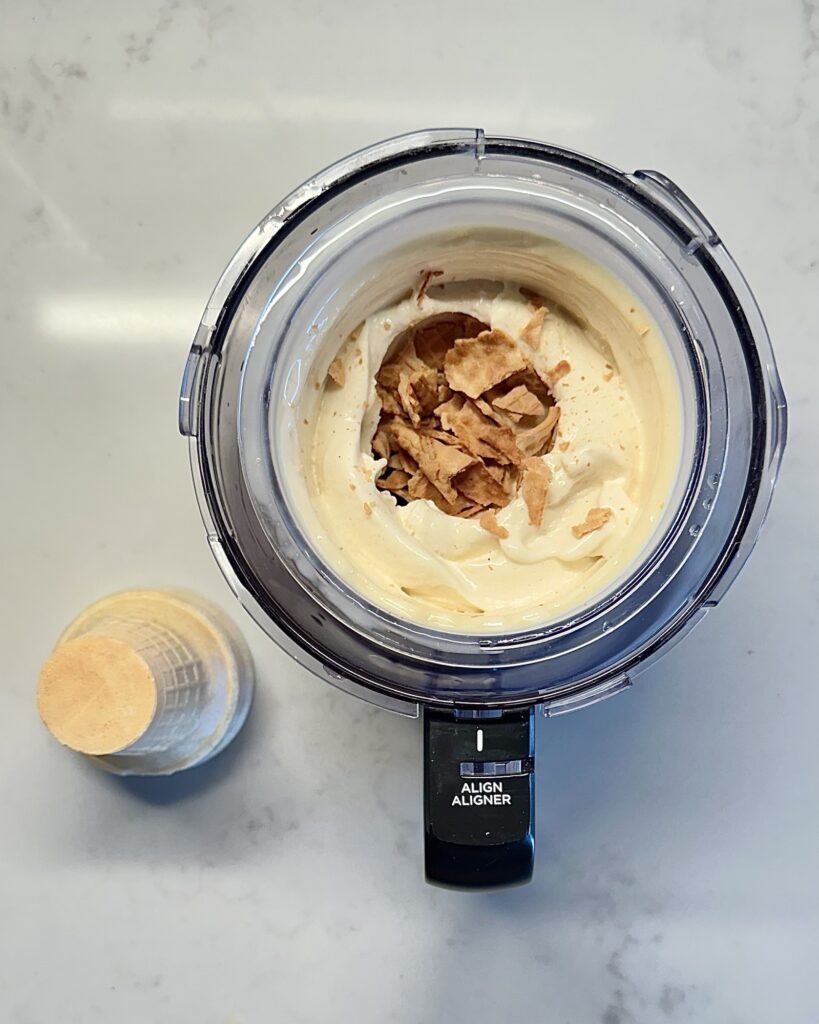
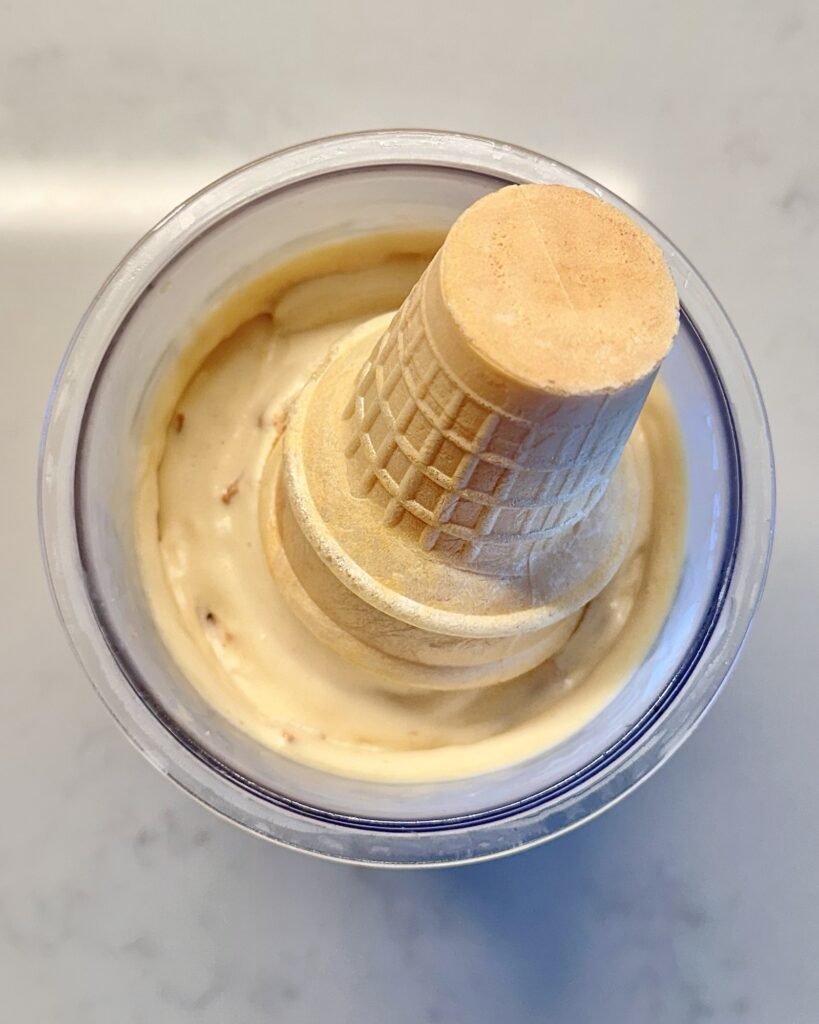
Mix In the Cone
Use a spoon to create a well in the center of the ice cream if one isn’t there already. Crush the sugar cone and drop it into the well. Spin on Mix-In mode. This distributes the cone throughout the ice cream, giving you crunchy, caramelized bits in every bite.
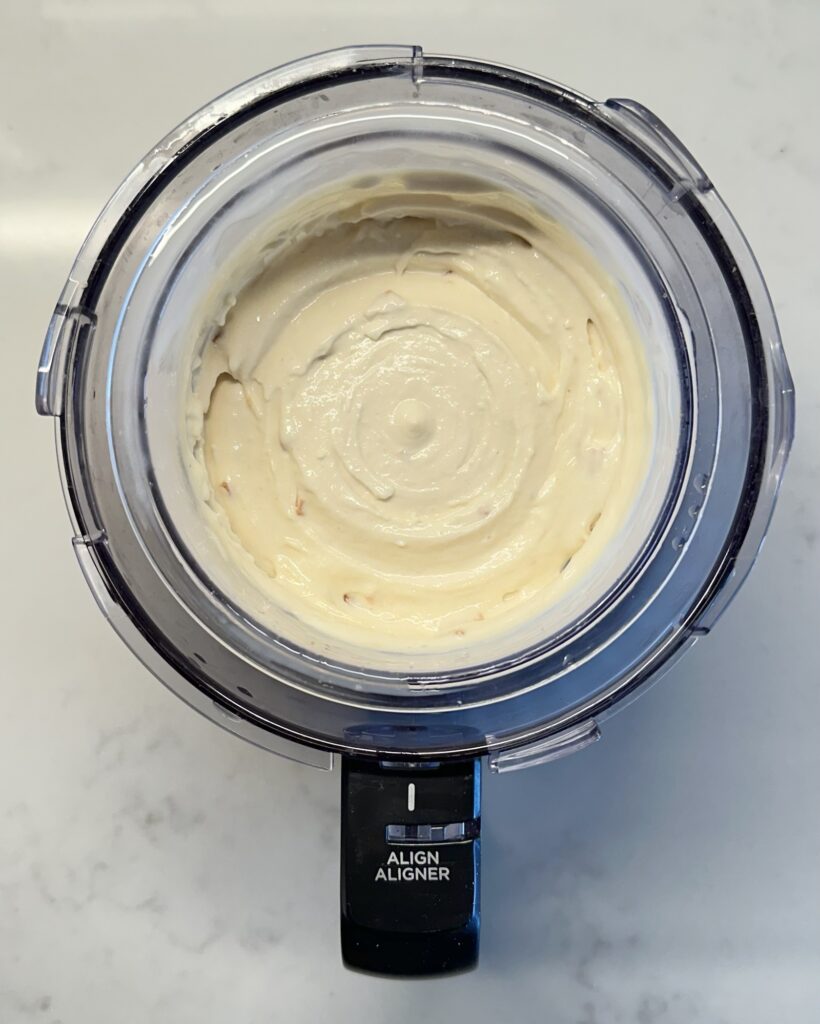
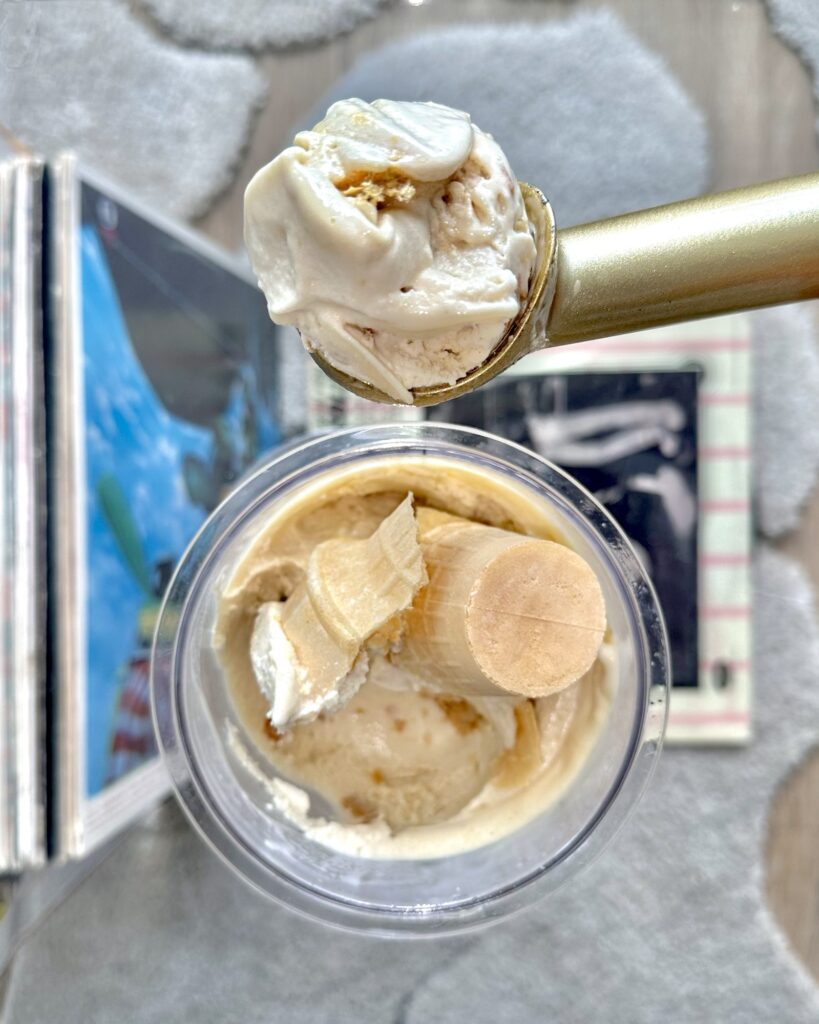
Top & Serve
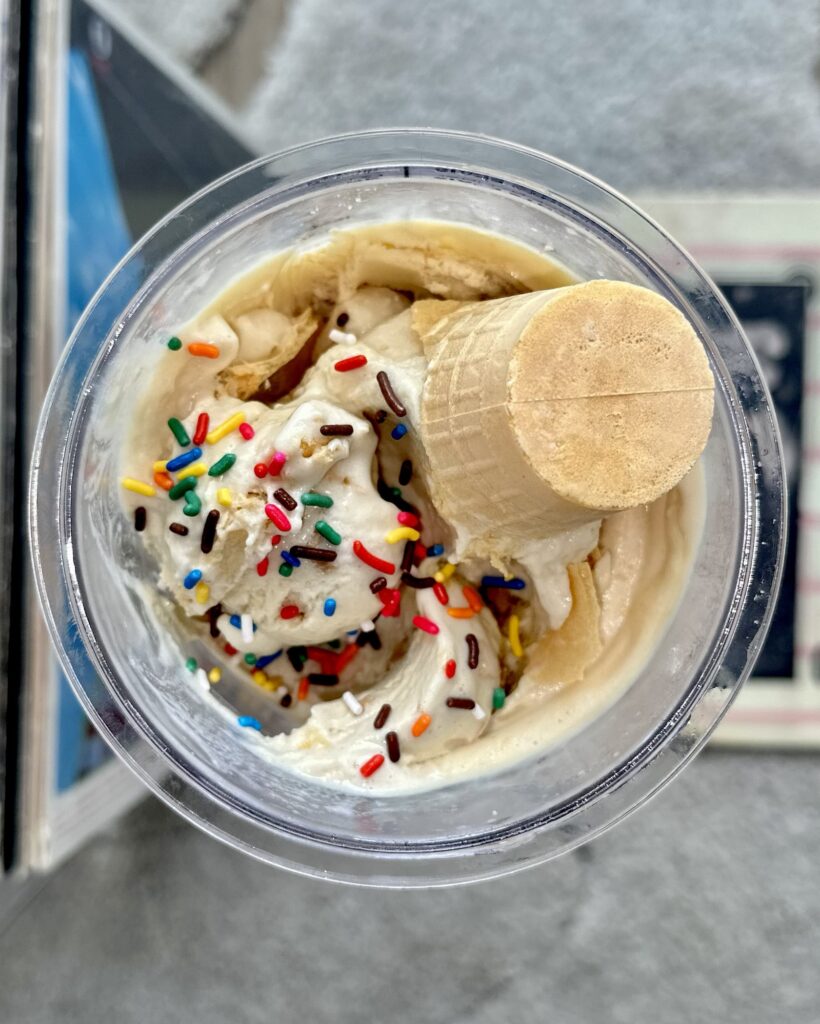
Finally, take the cake cone and either crush it on top or leave it whole, sticking out like the classic fairground cone. Serve immediately and enjoy your carnival moment in a pint.
Tips for Success
- Don’t Skip the Salt – Even just a pinch makes the vanilla pop and keeps the sweetness balanced.
- Choose the Right Protein Powder – A whey/casein blend usually gives the creamiest results. Pure whey can sometimes get icy.
- Customize the Cones – If you only have waffle cones, go for it. If you want chocolate-dipped cones, even better.
- Texture Adjustments – If you like your ice cream softer, add 1–2 tbsp of unsweetened almond milk after the first spin and re-spin again.
Why “Coney Island”?
Because it is cute and fitting duhhhhhh! When the flavor came to mind this name idea immediately followed. I was like wow, so this is what it feels like to be a genius? Lowkey though it also is on brand with the real Coney Island’s vibe. Boardwalk, fair, carnival, you know you’ll be able to find an ice cream here type vibe. So if you ask me… A WIN IS A WIN!
Gotta give Ben & Jerry’s a run for their money!
Variations to Try
Once you nail the base recipe, you can play with the flavors while keeping the “cone” theme alive. Here are some ideas:
- Chocolate – Swap vanilla protein for chocolate protein and add 1 tbsp cocoa powder. Mix in crushed waffle cone and top with chocolate-dipped cone pieces.
- Salted Caramel – Drizzle sugar-free caramel syrup into the well before adding the cone. Add a pinch of flaky sea salt on top for that salty-sweet bite.
- Cookies & Cream – Add a few crushed sandwich cookies with the cone. Top with cookie crumbs for extra crunch.
- Birthday – Use cake batter extract instead of vanilla, then mix in cone + sprinkles. A celebration in a pint.

Coney Island Protein Ice Cream
Ingredients
Method
- In a blender, combine all "Ice Cream Base" ingredients and blend until smooth.
- Pour the blended mixture into a Ninja Creami pint and freeze on a level surface for 24 hours.
- Once frozen, remove the pint from the freezer and run it under hot water for 1-2 minutes.
- Spin on Lite Ice Cream Mode.
- Respin 1-2 times until it reaches a smooth, creamy consistency.
- Create a well in the center (if one isn’t already there), then add the crushed sugar cone. Spin on Mix-In mode.
- Top it off with the cake cone (whole or crushed) and enjoy!
Try More Protein Ice Cream Recipes
If you loved this one, here are some other flavors worth trying:
- Chocolate Vanilla Swirl with Cookie Crunch Please Protein Ice Cream
- Rice Krispie Protein Ice Cream
- Strawberry Crunch Protein Ice Cream
- Birthday Cake Protein Ice Cream
Each one has its own personality, but the Coney Island pint will always be that playful, nostalgic recipe that brings you right back to the boardwalk.
FAQs
Can I make this dairy-free?
Yes! Swap the 2% milk for almond or oat milk, and use a plant-based protein powder. The texture might be a bit less creamy, but it still works.
Do I have to use cones?
Technically no—but then it’s not really “Coney Island.” You could swap with graham crackers or wafers if that’s all you have, but the cones give it that authentic vibe.
What if I don’t have sugar-free pudding mix?
The pudding mix is what thickens and stabilizes the ice cream. If you skip it, the texture will be icier. If you can’t find it, try adding 1–2 tsp xanthan gum as a stabilizer.
Can I meal-prep these?
Absolutely. You can prep multiple pints at once, freeze them, and then spin them as needed. Just don’t add the cones until spin day, or they’ll lose crunch.
Bringing It All Together
This recipe isn’t just about making a pint of ice cream—it’s about making dessert fun again. It’s the kind of thing you’ll want to share on Instagram, not because it’s “healthy,” but because it’s nostalgic and feels like something you’d actually buy at a boardwalk stand.
If you’ve been looking for a protein ice cream recipe that feels indulgent but still supports your goals, Coney Island Protein Ice Cream is it. It’s one of those pints you’ll crave again and again—because it’s guilt-free, and it’s genuinely delicious.
So grab your Ninja Creami, grab some cones, and spin yourself a carnival classic.